Tuesday, 2 December 2014

Final assessment- Steps of completing Mihaela's final design

Model and designer: Mihaela Solomei and hair stylist: Hoi Io Leong

On below, I have done the steps of how to create my assessment partner Mihaela Solomei's final hair design.

Equipments:
  • An apron
  • Sectioning clips
  • Hair clips
  • Hair pins
  • A padding
  • A hair crimper
  • Hair extension
  • Flowers x 5
  • A paddle brush
  • A comb
  • A tail comb
  • A hair bobble
  • Hair spray

Step 1: Wash the hands before getting started. Ask the model to put on the apron and if she has got any allergies.
2: Sectioning the hair. Divide the hair into three parts (for padding at the top, two French braids on each side of the head and also a bun at the bottom of the hair). Use sectioning clips to secure each sections of hair.
3: First, start with braiding the French braids on the side of the head. Divide the hair into two parts, one on the top and one on the bottom. French braid the hairs until it reach the middle of the hair (do the same for the other side as well). Secure the end parts of the French braid with hair clips on the hair.
4: After that, secure the padding. On the top part of the hair, measure where to place the padding (put it more at the front). Separate the hair into two parts (lesser hair at the front and more hair at the back). Create a plait on where you want to place the padding and secure it with hair clips onto the hair. Place the padding on top of the plait and secure it with hair clips. Wrap the back of the hair around the padding first and secure it with hair pins. After that, grab the front part of the hair and place over the back of the hair so no gaps with be seen. Secure the hair with hair pins.
5: Hair spray the hair and comb it so the hair will lie flat. Then, also hair spray the French braids to fix the shape of the braids as I’m going to remove the hair clips.
6: For the bottom part of the hair, Leave a part of hair on the top and secure the hair extension under the hair, so you can hide the extension into the hair. Tie the hair, including the French braids into a pony tail.
7: After that, Divide the ponytail into four sections. Grap a strand of hair from the pony tail and backcomb it so to get more volume. Then roll the hair and secure it onto the hair with hair clips inside. Do the same for the other three sections. Use a hair pins to move the hair together so no gaps with be seen and create a nice bun shape.
8: Put the five flowers onto the bun and the colour should be from the left (blue, red, blue, red, blue).

Practicing Mihaela's final design in lesson

Equipments:
  • An apron
  • Sectioning clips
  • Hair clips
  • Hair pins
  • A padding
  • A hair crimper
  • Hair extension
  • Flowers x 5
  • A paddle brush
  • A comb
  • A tail comb
  • A hair bobble
  • Hair spray
 
Thoughts about the practice:
I'm impressed about the final appearance of my partner's design that I've done during lesson. This is the first time I have tried to do the bun shape at the back of her head. Because her hair is very short at the back, so I have tried my best to hide the hair extension. As I'm backcombing the inside bits of the hair extension to create the bun shape, I found it really difficult to do it because the extension's hair go really hard and isn't smooth and flat. I have asked my partner about this and she told me to just backcomb the hair inside which I've done and comb the hair at the top, but still some bits of hair still not smooth as you can see the photo from above. Also this time, she asked me to put flowers on the bun for her design as well. In order to improve next time, I should do the hairstyle faster and I have decided to crimp the hair first on the final assessment day before getting started (Preparation time) as there are many techniques used on the hairstyle which I think I will run out of time. This time, I have hair spray the front part of the hair, then comb it and compare to the practice that I've done on the previous blog post, this time, it looks better and it looks more neat than last time as well. As my partner has really short hair and it's difficult for me to wrap around the padding, I have clips the hair onto the padding and secure it. On this practice, I found the most difficult parts are that as my partner has washed her hair on that day, her hair is very smooth, soft and also because she has short hair, it makes me more difficult to French braiding the hair and also divide the hair into sections. So I have told her not to wash her hair on the assessment day, as I need to spend more time on doing the hairstyle and also very difficult for me to complete the design.

Practicing Mihaela's design on my practice head

 
On above are the photos which I've taken after I have done my partner Mihaela's final hair design. She hasn't provided her final design hair chart yet, so I have practiced this hairstyle base on what she has told me to do and my understanding of her design. On her design, she wanted the front part of the hair to be crimped and place a padding at the front and then wrapped around the hair so the front part of the hair will get a big and high shape. On the two sides of the head, she want to create two French braids on each side (braiding till the middle of the head and secure them with hair clips). After that create a bun shape at the bottom of the French braids. First, tie the hair into a ponytail and divide the ponytail into 4 sections. Backcomb the inside bits of the hair and then roll the hair and secure it with hair clips. I have done the same for the other 3 sections as well.

My assessment partner, Mihaela Solomei's final design and ideas


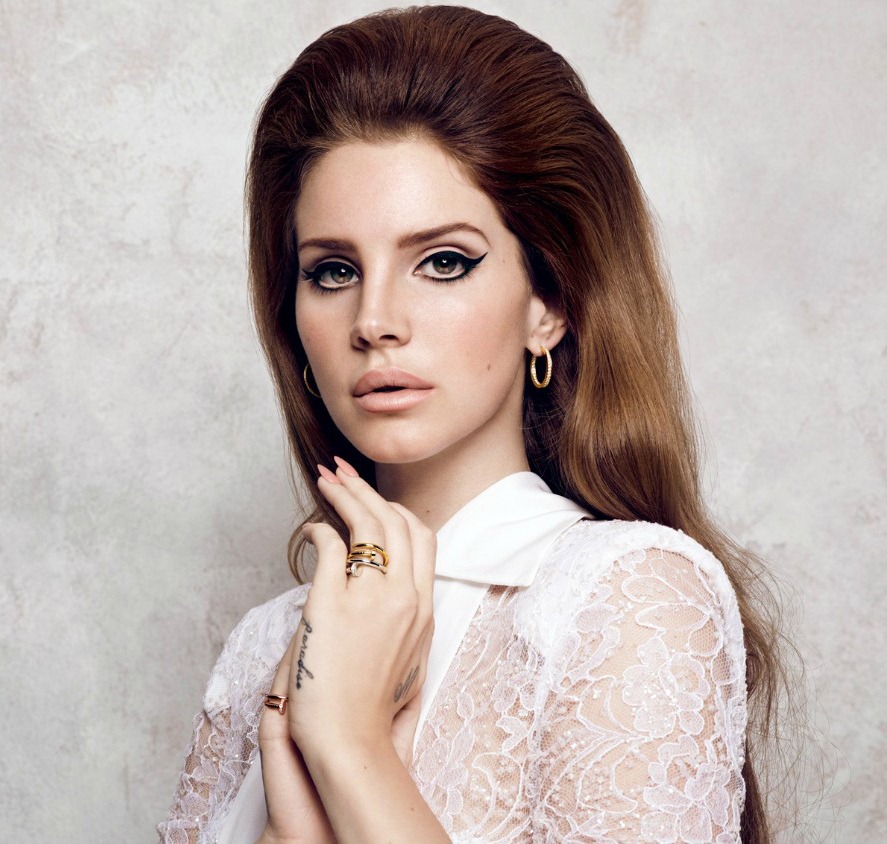
http://thatgrapejuice.net/wp-content/uploads/2014/06/Lana-Del-Rey-Ultraviolence-ThatGrapeJuice.jpg

http://www.afterthecircle.com/wp-content/uploads/2011/12/lana-del-rey-born-to-die.jpg

This is Mihaela's final hair chart of her design

The Ditchley Portrait of Queen Elizabeth I
c.1592
Marcus Gheeraerts the Younger


I have an interview with my assessment partner, Mihaela and we have talked about each other's hair design idea. She has chosen two images of Lana del Rey as the contemporary inspiration for her design. On the first image, it inspires her to have volume on the top of the head and the second image inspires her to use blue roses on her design. In order to link to the Elizabethans more, she has used red roses on her design as well. The blue rose means mystery, a sense of the impossible and enchantment. The red roses she used on her design are symbolic in Elizabethan portraits a sit symbolize the Tudor dynasty and the unity that it brought to the realm.  In the second image, Lana del Rey is sitting on a throne and there are two tigers beside her on each side and she thinks that it shows a symbol of power and determination. For the bun on her design, she told me that she wanted to do more things which links to the Elizabethans, so she decided to put it at the back of the head. She has chosen 'The Ditchley Portrait' of Queen Elizabeth I for her final design project. 


Practicing Mihaela's final design in lesson (first practice)

Equipments:
  • An apron
  • Sectioning clips
  • Hair pins
  • Hair clips
  • A hair crimper
  • A tail comb
  • A comb
  • A paddle brush
  • A padding
 
This is the first practice for my partner's final design and I've taken photos of the hairstyle appearances. My partner hasn't provided her final hair chart yet, so I did the hairstyle based on what she told me to do during the lesson. She told me that she want to place a hair extension at the back of the hair, but she hasn't bought the hair extension yet, so I just done the padding at the front and also the French braids on the sides. Also, she was not sure what she want to do with the decorations yet. I found it difficult to wrap her hair around the padding as she has got really short hair, so I have decided to put hair spray on her hair and comb it after so to give a flat finish. In order to improve next time, I should French braid the hair more tighter and do it more neatly.

Sunday, 30 November 2014

Final assessment- Steps of completing my final design

Model and designer: Hoi Io Leong (me) and hair stylist: Mihaela Solomei
 
Equipments:
  • An apron
  • Padding x 2
  • Sectioning clips
  • Hair clips
  • Hair pins
  • U-shape hair pins
  • A hair crimper
  • A hair straightener
  • Hair spray
  • Pearls pins x 8
  • A paddle brush
  • A comb
  • A tail comb
Step 1: Wash the hands before getting started. Ask the model to put on the apron and if she has got any allergies.
 
2: Section the hair (divide the hair into two parts: the front part is for zic zag curls, while the back is for padding).
 
3: To create the curls, put the hair out and in and out the hair pins. Continue with the process until u have finished. Use a bobby pin to secure the end part of the hair. After that, use hair straightener to crimp the curls.


4: Divide the hair into two sections. Leave the bottom part more hair as it is used to wrap around the padding. Crimped the hair first and separate the hair into half (Left and right). After that, start with the left session, measure where to place the padding.


5. Separate the hair into two and create a braid in between to hold the padding. After that, use hair clips to secure the braid onto the hair and then secure the padding onto the braid. Graband wrap the bottom part of the hair around the padding and put the top part of the hair over so the padding and no gaps will be seen. Secure the hair with hair pins. Do the same for the right side as well.

6. Put the top part of the hair which is not crimped over the crimped hair and leave two strands of hair from each side for the plaits. Secure the straight hair with hair pins at the bottom. Use hair spray and spray the straight hair, after that comb the hair to make sure the hair are straight and have a smooth texture. For the four strands of hair that I’ve left previously, create plaits and secure them with hair clips at the bottom.
 
7. Remove the pins from the curls at the front and brush them to create a big, frizzy texture.

8. Attach the pearls onto the plaits.
 
Finish


Tuesday, 25 November 2014

My final design (Hair chart and doing the design on my practice head), contemporary images inspired and chosen Elizabethan portrait

Final design hair chart

On above, I have drawn my final design out and it is the combination of design 2 and 3 that I've done previously and also the pearls composition is what I've decided to use after I experimented on the previous blog post.

Book Reference - Hair: Fashion And Fantasy by Laurent Philippon Page 256
Photo - Greg Lotus/Art + Commerce
Hair - Laurent Philippon
Makeup -  Kabuki
Stylist - Sophia Neophitou
Publication: Vogue Italia February 2006

Hair: Fashion And Fantasy by Laurent Philippon Page 74-75
Photo- Barry Lategan/ Vogue
The Conde Nast Publications Ltd
Publication - Vogue UK July 1972

Those two images from above are the contemporary images which inspired me to complete my final design.
 
http://upload.wikimedia.org/wikipedia/commons/thumb/7/7b/Elizabeth_I_(Armada_Portrait).jpg/603px-Elizabeth_I_(Armada_Portrait).jpg
The Armada Portrait
Sitter: Queen Elizabeth I of England
by an unknown artist
c.1588
Oil on panel

'The Armada Portrait' is the Elizabethan portrait that I've chosen for my final design inspiration.
 
Equipments:


  • Sectioning clips
  • Hair pins
  • Hair clips
  • U-shape hair pins
  • A hair straightener
  • A hair crimper
  • A paddle brush
  • A comb
  • A tail comb
  • Pearls pins
  • Padding x 2


On above, I have tried my final design on the practice head to show what it looks like.